顯示具有 資料還原 標籤的文章。 顯示所有文章

光碟救援!!

過去約五、六年前,由於硬碟的價格還很高昂,因此大多數的人都選擇用DVD來燒錄備份自己的重要資料。那時有很多 人可能備份了數百片、甚至上千片的光碟檔案,認為這樣保存資料應該就萬無一失了。但是現在當你把這些光碟想要載入硬碟時,發現有些光碟竟然無法讀取了,真 是始料未及。

快速瀏覽:

  1. 光碟救援原理
  2. 修復遭刮傷的光碟片表面
  3. 救援光碟片資料實作
光碟片無法讀取主要有兩種可能,一種是光碟片裡頭的用來保存資料的記錄層,因為化學變化導致資料無法讀取。第二種原因則是光碟片因為保存不當,導致光碟片的讀寫面產生刮痕,造成光碟機的讀寫頭讀取資料不正常,而無法讀取資料。
▲當你複製光碟的時候,發現視窗停頓在這個畫面很久,光碟機不停的轉動,但什麼反應都沒有,那很有可能就是光碟受損了。

更換光碟機讀取試試看

由於光碟片的讀寫原理,是利用雷射光束將資料打到光碟片的反射層上,然後藉由反射的原理,將刻在反射層上的數位資料折射讀取回來,然後才能轉換為電 腦資料。因此,光碟鏡面上的刮痕雖然並沒有傷害到數位資料本身,但是因為影響了反射過程的訊號讀取,所以導致資料讀取失敗。因此,市面上有一些修補光碟的 工具,主要都是針對修補鏡面刮痕而設計,可以透過這類型的工具來將影響雷射讀取的障礙減低,提高讀取成功的機率。
至於光碟片變質的問題,在採取之後的其他急救步驟之前,建議你可以先更換一台電腦,用其他人的光碟機讀取試試看。因為撇開光碟片的因素,光碟機的讀 寫頭也有可能因為使用過久,而輸出的雷射讀寫功率不夠,因此造成某些品質較差的光碟片讀取不到。這個時候,如果更換一台新的光碟機,或是其他電腦的光碟 機,就有可能因為輸出功率正常,而能夠正常讀取你要搶救的資料。
▲市面上有販售這種「光碟片修復機」,號稱可以將受損的光碟自動修復。不過其實你也可以在家自己動手用現成的工具修復受損光碟。
▲光碟燒錄片雖然號稱可以保存很久,但其實五年、十年,就可能因為染料變質或是刮傷而無法讀取資料。

光碟救援軟體原理

當你將有問題的光碟片放進電腦,可能可以從檔案總管中看到光碟片的檔案目錄,只是當你要複製檔案時,總是卡在某個地方然後永遠跳不出來。或是有另一種情況是電腦根本找不到這個光碟片,表示為空白。
在這裡我們介紹的救援軟體,是針對前面的第一種狀況。如果電腦找不到這個光碟片,用救援軟體是無解的,你只能試著用其他光碟機讀取看看。而光碟救援 軟體的原理,是利用重複讀取光碟片發生錯誤的資料區域,或是降低讀取光碟的速度以提高讀取資料的正確性,甚至可以選擇略過錯誤不計來盡可能地搶救光碟片上 的資料。

CD Recovery Toolbox Free

這是最推薦的光碟救援軟體,可以針對鏡面刮傷進行多層次的處理,先是降低光碟讀取速度重複讀取相同損害的地方,然後真的讀取不到就略過補上特定的資訊。只要設定好要救援的光碟機來源,它就會自動去讀取光碟片並進行修補。
▲CD Recovery Toolbox的使用步驟很簡單,介面上也有清楚的指引你走向下一步。

Roadkil's Unstoppable Copier

大陸網友開發的工具,介面上採簡體中文顯示。它會將讀取不良的檔案部分,用特定資訊填寫進入,以提高檔案搶救的機率。提供了較多的搶救選項,可以設定是否要略過損害的檔案,選擇速度快或是較佳但速度慢的救援方式。
▲Roadkil's Unstoppable Copier採簡體中文介面,提供較多的設定可進行修補。

MiniTool Power Data Recovery

在前面介紹修復磁區的時候,我們用它來做過救援分割磁區資料的介紹。其實它的功能真的很廣,從反刪除檔案、救援分區檔案,到光碟回覆的功能都有提供,只是免費版本只有提供1GB的資料救援量,不免會讓人有點小失望。
▲包山包海的MiniTool Power Data Recovery,也有提供光碟救援的功能。

GMVB

GMVB的全名為「Get My Videos Back」,除了影片之外,它也可以拯救音樂檔案,他一次只救一個檔案,而在下方會顯示該檔案的資料區塊,會以紅色標出有哪些地方資料是損毀並且救不回來的,讓你比較清楚救援的結果。
▲一定要點選左下角的「Open And Start」按鈕才會開始救援光碟的動作。

修復遭刮傷的光碟片表面

如果你的光碟鏡面刮傷很嚴重的話,建議你在使用救援軟體之前,可以先針對光碟的鏡面做一些修補的動作。可以提高軟體救援的成功率。

Step 1

用來修補光碟片的主要工具為:牙膏、無色的鞋油、化妝棉。牙膏本身是顆粒很細的研磨劑,可以將刮痕有效的減少,而不致於在鏡面上造成更多的刮傷。

Step 2

利用牙膏在光碟刮傷的部位上塗抹,不需要太多,然後用化妝棉在刮傷的部位,以小範圍、順時針的方向來慢慢將牙膏塗平,反覆以順時針圓形的方式,將刮傷的範圍盡量磨平。

Step 3

你應該盡量用化妝棉打磨到將刮傷的部份磨平,但是牙膏的效果有限,最後一定還是看得到刮痕。打磨到後來應該要看不到牙膏,只在光碟鏡面上留下一層霧面的模糊範圍,如果你打磨到後來牙膏還殘餘很多,那就用清水清除。

Step 4

現在將光碟片放下,另外取一張新的化妝棉,沾取鞋油準備對霧面進行去污、拋光的動作。再次提醒,鞋油要用無色的。

Step 5

鞋油的成分其實就是由蠟跟油兩種成分所構成,因此可以將牙膏的霧面很好的清除掉,並且還可以藉由蠟將光碟的鏡面再加以拋光。

Step 6

雖然照片很難真實還原光碟片上刮痕處理的前後比較,但真的有很明顯的差別,而且對於後續光碟救援軟體的處理,雖然依然偶爾有讀取障礙,但是已經大大減低救援所需時間。

救援光碟片資料實作

如我們前面強調的,光碟救援最好是軟硬兼施,先在有刮痕的光碟片進行鏡面的處理,將可以讓這個步驟進行的更順利,救援的資料完整性提高。

Step 1

CD Recovery Toolbox Free整個設計的流程很自動,使用者幾乎不需要任何的設定動作。執行程式之後,它會自動檢查電腦中的光碟機以及光碟,然後你只需要按下「Next」執行即可。

Step 2

就跟其他的救援軟體一樣,你必須要指定電腦中其他的硬碟資料夾位置,用來儲存救援出來的檔案。點選上方的按鈕,選擇要儲存的資料夾位置。

Step 3

接下來會以樹狀結構列出這張光碟裡頭的所有資料夾以及資料夾檔案,如果你要全部都救出來,就選擇全部勾選,不然就僅選擇你要的檔案來拯救就好了。選擇完畢,按下方的「Save」按鍵就可以開始儲存檔案。

Step 4

接下來會開始複製檔案到你的硬碟上,並且會有救援出來的檔案清單,在後面綠色的字表示處理狀況良好,已經成功將檔案儲存到硬碟上。

Step 5

一切過程幾乎都是自動化,最後你只要看這個視窗所列示出來的清單,就可以看到有多少筆檔案儲存到你的硬碟中,以及每一個檔案是否有狀況。

Step 6

前面的示範步驟顯示的是光碟修復良好的狀況,如果你的光碟損害嚴重,則在跑完第一輪檔案救援的動作後,接下來程式會自動降低光碟讀取的轉速,用其他 救援技術來提高檔案的救援機率。當你進到這步驟,通常接下來就要等待很久的時間才會結束。當你看到清單中檔案狀況都是紅字的話,表示會進入進階的救援過 程,要花更多的時間來處理刮痕上的資料。

轉自 T客邦

Quickpost: Disassociating the Key From a TrueCrypt System Disk

TrueCrypt allows for full disk encryption of a system disk. I use it on my Windows machines.

You probably know that the TrueCrypt password you type is not the key. But it is, simply put, used to decrypt the master key that is in the volume header.

On a system drive, the volume header is stored in the last sector of the first track of the encrypted system drive (TrueCrypt 7.0 or later). Usually, a track is 63 sectors long and a sector is 512 bytes long. So the volume header is in sector 62.

When this header is corrupted or modified, you can no longer decrypt the disk, even with the correct password. You need to use the TrueCrypt Rescue Disk to restore the volume header. This rescue disk was created when you encrypted the disk.

I’m using Tiny Hexer on the Universal Boot CD For Windows to erase the volume header (you can’t modify the volume header easily when you booted from the TrueCrypt system disk; using a live CD like UBCD4WIN is one possible workaround).

First I’m checking the geometry of the system drive with MBRWizard:
Take a look at the CHS (Cylinders Heads Sectors) value: S = 63 confirms that a track is 63 sectors long.

Then I open the system drive with Tiny Hexer (notice that the sector size is 512 bytes or 0×200 bytes):


I go to sector 62, the last sector of the first track:

It contains the volume header (an encrypted volume header has no recognizable patterns, it looks like random bytes):

Then I erase the volume header by filling the sector with zeroes and writing it back to disk:

And if you absolutely want to prevent recovery of this erased sector, write several times to it with random data.

Booting is no longer possible, even with the correct password. The TrueCrypt bootloader will tell you the password is incorrect:

One can say that I’ve created a TrueCrypt disk that requires 2-factor authentication. To decrypt this disk, you need 2 factors: the password and the corresponding TrueCrypt Rescue Disk.

First you need to boot from the TrueCrypt Rescue Disk, and select Repair Options (F8):

And then you write the volume header back to the system disk. Remark that the TrueCrypt Rescue Disk requires you to enter the password before it writes the volume header to the disk:
And now you can boot from the system disk with your password.

Use this method if you need to travel with or mail an encrypted system disk and want to be 100% sure there is no way to decrypt the drive while in transit. But don’t travel with the 2 factors on you, send the TrueCrypt Rescue Disk via another channel.

Remark: MBRWizard allows you to wipe sectors, but for whatever reason, it couldn’t successfully wipe sector 62 on my test machine.

Oh yeah, don’t forget to make a full backup before you attempt this technique


轉自  http://blog.didierstevens.com/2012/02/09/quickpost-disassociating-the-key-from-a-truecrypt-system-disk/

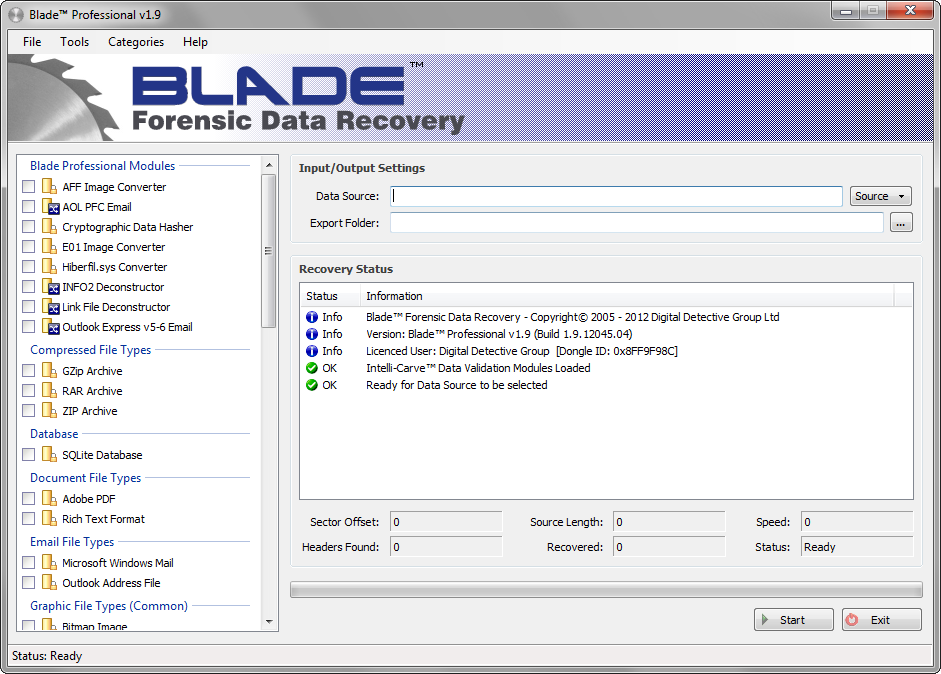
Blade™ v1.9 Released - AFF® Support, Hiberfile.sys Conversion and New Evaluation Version

Digital Detective Software - Blade Professional - Forensic Data Recovery

This release of Blade brings a number of fixes and some great new features.  This is the first release of Blade to have evaluation capabilities which allow the user to test and evaluate our software for 30  days. When Blade is installed on a workstation for the first time (and a valid USB dongle licence is not inserted) the software will function in evaluation mode.

The following list contains a summary of the new features:
  • Support for Advanced Forensic Format (AFF®)
  • Hiberfil.sys converter - supports XP, Vista, Windows 7 32 and 64bit
  • Accurate hiberfil.sys memory mapping, not just Xpress block decompression
  • Hiberfil.sys slack recovery
  • Codepage setting for enhanced multi-language support
  • SQLite database recovery
  • 30  Day evaluation version of Blade Professional
  • New recovery profile parameters for more advanced and accurate data recovery
  • Support for Logicube Forensic Dossier®
  • Support for OMA DRM Content Format for Discrete Media Profile (DCF)
We have also been working on the data recovery engines to make them more efficient and much faster than before. The searching speed has been significantly increased.

轉自 http://blog.digital-detective.co.uk/2012/02/blade-v19-released-aff-support.html

Downloads and Full Release Information

Back to Basics, CD and DVD basic forensics

At G-C (my company) we try to have an internal training topic for about 30 minutes to an hour every day (that I'm in the office). Often times we will go over case studies of recently solved cases but other times we get back to basics because you can't assume everyone knows everything you do. One class we recently did was on CD/DVD forensics and since it was received well I thought I should do a similar thing here on the blog. I admit I was watching the barefoot contessa's 'back to basics' show before i wrote this so the title is most likely influenced by delicious food.

I think a lot of people have forgotten about DVDs and CDs as important forensic evidence with the widespread use of cheap reusable USB storage (commercially introduced in December 2000 (Thanks wikipedia!)), but back when I got started (1999) it was very much 'a thing'. There are four important things we can determine forensically from a CD/DVD.


1. The volume name of the CD (always)

2. When it was burned (always)
3. What software made the CD (sometimes)
4. The previous burns (always)
and some easter eggs.

1. The volume name of the CD

All of the CDs I reviewed start with a ISO9660 session on the disk which began at an offset of 8000. You can see in the screenshot below that standard identifier has been set as 'CD001' which is the default for most burners when a ISO9660 session is selected. However what we care about is right after that the name of the CD is ' Oct 28 11 09:33'.


You may think, why do I care about this, this is the volume name that I can see in any tool? Well if you have a multi session disk the volume name will be set to the current session, this may be the only way you have to determine the labels of the prior sessions. We will talk more about sessions in 4.


2. When it was burned

Near the end of the ISO9660 session block are four time stamps, I've always seen them set to the same time. This is the time the CD/DVD was created.


Let's break the timestamp down to a more readable form:


2011102808333500è

2011102808333500è
2011102808333500è
2011102808333500è

As you can see each of them terminates with ascii character è which is hex E8. Breaking down an individual entry we can see that the time is:

2011 10 28 08 33 3500
So October 28, 2011 at 8:33:35am is when the CD was burned, notice this is one hour off of the CD label time. Note that this time is only as accurate as the system clock that burned the CD/DVD.

3. What burned it

Depending on what software burned the CD/DVD many of them will also place the name and version of the software in the reserved space of the ISO9660 session start. In our example we can see that the name of the software that burned it is 'PRASSI2.1.374'.


Doing some quick searches for 'Prassi cd burning software' reveals that this is Primo Prassi version 2.1.374 a now defunct company whose software was bundled with some CD/DVD burners.

Why do we care? If you are trying to prove that a CD/DVD was burned on a particular system matching the software name and version to what was installed on the system can be one indicator that you can use.

4. The previous burns

If you are inspecting a rewritable CD/DVD and it has had more than one write burned to it, then each of the writes are still available. There are multiple layers of burnable media within a rewritable disk and when inserted into a CD/DVD ROM your computer will only show the most recent session. When you image the CD/DVD using a tool like FTK Imager all the prior sessions will be viewable. This is why determining the name of the session may be important as we detailed in 1.

5. Easter Eggs

Sometimes you'll find something unexpected. The ISO9660 specification does not state what can't exist within the reserved space of the session start and systems don't parse for unused areas. For instance within MSDN DVDs you'll be Microsoft's name, address and phone number. What is contained within the session start beyond what we've described here will also depend on what the burning software programmer decided to place within it.

That's it, I hope this shined some light on a possibly forgotten set of facts. Let me know what you think, your comments help to motivate me to keep posting in between baby bottles. 


轉自 http://hackingexposedcomputerforensicsblog.blogspot.com/2011/12/back-to-basics-cd-and-dvd-basic.html 

DocumentsRescue Pro

Office DocumentsRescue Professional recover lost data from Hard Drives, CompactFlash cards (type I/II), IBM Microdrives, SmartMedia cards, MultiMedia cards (MMCs), Secure Digital (SD) cards, Memory Sticks, CD/DVD disks, and any other storage device with the addition of wide range file format support: DOC, XLS, PPT, RTF, LIT, etc.

DocumentsRescue Pro is an effective document recovery tool for Microsoft Word, Excel, PowerPoint, Project, Publisher, Visio and many other popular document formats. DocumentsRescue Pro can recover documents lost due to computer crashes, accidental deletion - even if the Recycle Bin has been emptied, formatting of a disk drive, and when a document has never been saved! Easy to use for novice users, as well as a feature rich advanced mode for the skilled technician users. DocumentsRescue Pro is not just 'undelete' tool it can easily, quickly and absolutely reliably reconstruct the lost document files that undelete programs can never recover.

Program features

- Recovers deleted and corrupted files
- Recovers data from formatted media
- Recovers data from corrupted media
- Supports all popular formats of document files *
- Supports all formats of media used by digital devices
- Works with all digital devices and card readers
- Easy to use, intuitive wizard-driven interface
- Supports Windows® NT/2000/XP/2003/Vista
- and many more!

轉自 http://www.essentialdatatools.com/products/documentsrescuepro/

Recovering and Analyzing Deleted Registry Files

Comparison of Memory Forensic Tools

Currently, we have some options when analyzing memory images. Mandiant released Redline, that is the replacement of Audit Viewer. HBGary distributed Responder Community Edition at CEIC, and Volatility Framework 2.0 was released a few days ago. I tested them including my EnScript and consider their capabilities and limitations 

Mf_comparison

If you are a beginner about memory forensics, I recommend Redline without question. Redline supports all 32-bit/64-bit Windows versions and the user interface is graphical. 

Besides, Redline has an significant feature called Malware Risk Index (MRI) that detects malicious processes. Responder CE is also a GUI tool and supports all versions and architectures, but it limits an image size to 6GB and has no function like MRI.

Redline and Responder can detect unlinked kernel objects caused by DKOM. On the flip side, they cannot extract terminated processes and closed network connections. Therefore, I think HBGary and Mandiant don’t implement Object Fingerprint Search method. Some modules of Volatility Framework (*scan modules) carve kernel objects by searching pooltag in pool headers, so Volatility can recover dead process information, closed sockets, unloaded kernel drivers, and so on. EnScript also can do that because its code is based on Volatility.

Volatility Framework can parse 3 format images (raw/crash dump/hibernation). It’s useful for acquiring volatile data from power-off laptops. Additionaly, Volatility Framework is open source and many developers join the community. However, Volatility Framework now supports only 32-bit architecture. I hope Volatility will support 64-bit machines. 

EnScript CDA (Crash Dump Analyzer)  extract  volatile info from x64 memory images and EnScript has multilingual keyword search/detecting similar process (by entropy) functions, but the total ability is slightly poor as compared to other tools because I’m lazy. 

Conclusion:
There is no perfect tool. Investigators should analyze RAM by a combination of some tools. Primarily, use Redline. If you want to extract freed objects such as terminated process and closed TCP connection, use Volatility Framework/EnScript. If you examine Windows 7 or Server 2008 images, you should validate network connection information by using multiple tools because some tools occasionally miss connection objects.


By the way, Moonsols converting tools like bin2dmp/dmp2bin sometimes cannot work. So when you acquire memory image, I recommend you acquire multiple format images (raw/crashdump). In my experience, it seems to happen in case of Windows 7/2008 x64 images.


轉自 http://cci.cocolog-nifty.com/blog/2011/08/comparison-of-m.html

Mounting Split Raw Images

A raw image, made with dd or a variant, is still a common image format, and will not go away soon even as many argue the benefits of forensic images such as the Expert Witness Format (supplied through libewf) and the Advanced Forensic Format (supplied through afflib).  But raw images can be difficult to tote around because they are bit for bit copies which makes the copy as large as the original.  As such, the images are often split to fit on external media such as DVD.

But splitting, while solving storage problems, creates a new problem.  What if you want to mount the image for examination?  True, Sleuthkit can handle the examination of split raw images, but sometimes there is no equal to simply mounting an image during an examination.


Let me illustrate using a situation I encountered yesterday.  A colleague had a split raw image of over 200 segments that he wished to mount and then boot in a virtual machine.  He tried to follow
my tutorial  but was unsuccessful, uncertain as to why.  When I looked into the situation with him, the issue became clear: xmount, the tool used to create a virtual disk from a disk image, was only mounting the first segment of the split raw image, despite being given all the segments as arguments as is required with Expert Witness Format images.  More simply put, xmount does not handle split raw images.  It will handle a single raw image file just fine, however.

What to do?  One could simply cat the files together, but that means doubling storage requirements, at least until the concatenation operation is concluded.  That might not be feasible or desirable, and it can be very time consuming.  In this case, we were talking 300 GB of data.  It would be great to be able to treat the segments as one file, and pass that file to xmount to accomplish the purpose.


Affuse
to the rescue!  Affuse is part of the afflib tool suite.  It creates a virtual file system using fuse and mounts it to a location you specify.  You only pass the first segment of the split image as an argument.  The command takes the form:

# affuse image mount_point

Affuse creates an image.raw file (that is, the name of the segment with '.raw' appended)  in the mount point along with a log file.  Yes, its that easy.

To finish the scenario, xmount can then take the image.raw file as an argument to create the virtual disk, thusly:


# xmount --in dd --out vdi --cache image.cache mount_point/image.raw new_mount_point/

This command tells xmount that the input file, image.raw, is raw data, the output desired is a VirtualBox vdi format, that a cache file called "image.cache" is desired to store system changes when the virtual machine is running.  The .vdi file will be mounted in the "new_mount_point" directory.  If xmount is unfamiliar to you, I recommend you read my previous post.

Like affuse, xmount utilizes the fuse file system.  Both utilities accept fuse file system arguments as well as tool specific arguments, so read only mounting and permissions options exist (type "man fuse" at the command line for more details).  As always, practice on non-case data to become familiar with the tools. 


轉自 http://linuxsleuthing.blogspot.com/2011/07/mounting-split-raw-images.html

Salvaging Digital Video Fragments

Posted By Eoghan Casey
Digital video is becoming a more common form of digital evidence with the increasing prevalence of video in computers, mobile devices and cameras. Digital cameras can create high quality videos, most smart phones can create videos, and the iPad2 has two cameras that can create videos. The videos created by such digital devices can be stored on removable storage media and on the devices themselves. Frequent creation and deletion of videos on these kinds of devices can result in fragments of deleted video clips that most file carving tools cannot salvage. In addition, when dealing with Flash memory dumps acquired from mobile devices, data at the physical level is often fragmented. Specialized methods and tools are needed to salvage deleted video fragments as demonstrated in this article using the contents of Flash memory acquired from a Motorola V3 (RAZR) mobile device.

File Carving Limitations
Most file carving tools require a known file header in order to salvage deleted data. For instance, to recover a deleted 3gp file, most carving tools look for the file headers such as the following.

Hex view of 3gp header in the Motorola V3 Flash memory dump

If the file is fragmented or the header is missing, the file carving approach will not salvage the deleted video successfully. In this example, a file carving tool that searched the Motorola V3 memory dump for several 3gp header signatures found two files in as shown in the audit log:
    05/24/2011, 11:26:35
    QuickTime 3GP (3gp), header: ftypisom
    QuickTime 3GP (3gp), header: ftyp3gp
    QuickTime 3GP (3gp), header: ftypmmp4
    Default file size: 1024 KB
    Maximum file size: 100 times (individual file type definition defaults sizes respected)
    
    E:\Physical GSM Motorola V3 RAZR\Flex Partition 1140000-1fe0000.bin
    Scope: 000000 - E9FFFF
    Extensive byte-level search
    
    9D0E80 - AD0E7F: 00001.3gp
    B888F0 - C888EF: 00002.3gp
    
    05/24/2011, 11:26:35
    2 file headers were found. 2 files were retrieved.


However, the salvaged files were invalid because the original files were fragmented. Furthermore, the names and directory paths of these files were not obtained using this method, demonstrating a further limitation of file carving.


Salvaging Video Fragments


When video files are fragmented, it is necessary to consider the video file format in more detail. Fortunately, many digital video formats have a structure that can be used to find and salvage individual frames. A frame is a discrete section of the video that can have a timecode or sequence number and other characteristics that can be useful for salvaging digital video clips.


The defraser tool can be used to identify frames for several video formats in a forensic duplicate of any piece of storage media, including a removable storage card, computer hard drive and Flash dump from a mobile device. The following screenshot shows defraser used to detect video related data in the Motorola V3 memory dump.


Defraser showing video related data in the Motorola V3 memory dump


Although the defraser tool does not automatically piece together the frames into a video that can be played, it does make the frames available for manual reconstruction. With some effort, defraser may be used to combine fragmented frames into a valid video file that can be played.


As with file carving methods that rely on header signatures, the carving methods employed by defraser do not provide the filenames and directory path of salvaged video data in the context of the original file system.


File System Reconstruction


Ultimately, the most effective approach to extracting digital video files from acquired digital evidence such as a Flash memory dump from mobile device is to reconstruct the logical arrangement of data. On mobile devices, this logical structure involves the flash abstraction layer and file system. Using mobile device forensic tools such as Cellebrite Physical and XRY, it is possible to reconstruct and review logical file structure of a Flash memory dump as shown below with a 3gp video stored in an MMS related file in the Motorola V3 memory dump. Note that different tools may interpret the logical structure differently and show more files and folders, clearly demonstrating the importance of validating the results of forensic examination tools.


XRY/XACT showing the logical file system in the Motorola V3 memory dump


Cellebrite Physical showing the logical file system in the Motorola V3 memory dump


Extracting the MMS file using such a mobile device forensic tool and extracting the video content as discussed in the “Delving into Mobile Device File Systems” blog post results in a 3gp file that can be played using VLC media player.


Playing salvaged digital video using VLC Player


Examination of Salvaged Video


After salvaging digital video files it is important to review the resulting data closely for potential anomalies. For instance, using MediaInfo to extract metadata from video files shows details related to its creation and format. The following screenshot shows metadata from a 3gp video extracted from the Motorola V3 memory dump, revealing that the embedded date-time stamp was set to an incorrect date.


Metadata within a 3gp video displayed using MediaInfo


In addition, reviewing individual frames within a salvaged video file can reveal anomalies such as portions of two unrelated videos being combined into one salvage file. The following screenshot shows frames extracted from a 3gp file using DCCI Video Validator revealing footage from two unrelated video files.


Frames extracted from digital video using DCCI Video Validator


Conclusions


When a video file is fragmented or the header of a video file is overwritten, carving methods that rely on header signatures and contiguous files will not salvage video files successfully and may even incorrectly combine unrelated video fragments into a single file or fail to detect the presence of video content altogether. However, using specialized tools such as defraser, a digital investigator may be able to salvage fragments of video files and piece them together into a valid video file. This process of reconstructing video fragments is time consuming and error prone, particularly when dealing with numerous video files on a single piece of storage media or mobile device. Therefore, whenever feasible, it is preferable to reconstruct the logical arrangement of data to extract the complete content of video files. Whichever method is most effective for salvaging digital video, it is important to examine the results closely to ensure the accuracy and completeness of the resulting videos. Such a review includes inspecting embedded metadata for anomalies and reviewing keyframes for possible fragments of unrelated video footage.


轉自 http://blog.cmdlabs.com/2011/05/30/salvaging-digital-video-fragments/

iOS 4問世一年後 硬體加密終遭破解

俄羅斯數位鑑識工具廠商Elcomsoft表示已率先成功破解iPhone 4的資料安全防護,這意謂該公司已突破iOS 4的硬體加密技術。

何以iOS 4問世將近一年後才有辦法取得其中資料?Elcomsoft CEO Vladimr Katalov在部落格中指出,該公司發現破解iOS 4裝置image加密的方式,破解image極為有用,並可用鑑識工具,像Guidance EnCase、AccessData FTK,或其他支援硬碟image及HFS+檔案系統的工具來分析。

iOS 4版之前,要取得bit level Apple iPhone、iPod Touch及iPad裝置內檔案系統的快照以復原資料相當容易,和把DVD轉成ISO檔案類似。但到iOS 4時,蘋果加入硬體加密的技術,意謂著,即使拿到檔案系統,若不知加密金鑰也無能為力。

若想成功從裝置抓出資料,調查人員也必須能存取硬碟才能解密。「若碰不到裝置本身是不可能解密的,因為我們必須取得存在裝置內的密鑰,而且途中不能丟棄或儲存。」Katalov說。

然而從iOS 4取得的資訊很有限,除非鑑識調查人員(或駭客)知道裝置的密碼,因此預防的最好方法是以長而繁複的密碼取得「簡單密碼」以免透過字典攻擊法猜出。

轉自 http://news.networkmagazine.com.tw/security/2011/05/27/24635/

Volume Shadow Copies

Posted by: Joe G


Author Name
BryanTheSnail


Artifact Name
Volume Shadow Copies


Artifact/Program Version
Windows 7
 
Description
This method allows Encase users to explore the contents of Volume
Shadow Copies. As yet I have only tested this on a Windows 7×64
machine, I can not say how effective it will be on other systems.
Most of this method originates from the paper on the antiforensics.net
website from the attached link.
1. Use the Enscript from Lance Mueller to make a ‘dd’ image of your
drive.
2. Use the VHDTool to create a Virtual Drive from your dd image.
3. Open Disk Management (Click Start enter diskmgmt.msc into the
search field )
4. Mount your VHD as a Virtual Disk selecting “Read Only”
5. This step needs more testing and unfortunately I do not have the
time to do it. If you try to use Shadow Explorer at this stage it will
be unable to see the Virtual Disk. There may be a command
line/registry hack which will enable this but I have not yet explored
this option. The solution I did find was to reboot the machine. Once
rebooted Shadow Explorer can quite happily access the Volume Shadow
Copies and allows you to export any relevant files. There is no search
option unfortunately.


Registry Keys
Various


File Locations
System Restore


Research Links
http://antiforensics.net/Computer-Forensics/accessing-volume-shadow-copies.html
http://www.forensickb.com/2007/07/export-encase-evidence-file-to-dd.html
http://archive.msdn.microsoft.com/vhdtool
http://www.shadowexplorer.com/


Forensic Programs of Use
Encase
VHDTool
Shadow Explorer


轉自 http://forensicartifacts.com/2011/05/volume-shadow-copies/

EnScript to parse classic (.evt) event log entries in unallocated

This EnScript was inspired by a blog reader who emailed me to ask for a solution to parse some windows event log entries that were found in unallocated.

There are a couple ways I could think of to solve this issue. The easiest was to just build a parser to read a single event log record that was found in unallocated and display the data in the single record. The problem with that solution is it does not scale well and it will become very tedious when there are numerous records found in unallocated and requires a person to parse each one individually.

The final solution was an EnScript to perform a search for the magic value of "LfLe" which appears in every valid event log record. Once a hit is found, then the record is parsed and exported out into a separate .EVT file.  Every hit is exported out into the same .evt file and in the end, you will have a single "eventlog.evt" that contains all the valid windows event log entries that were found in unallocated. You can then use your favorite 3rd party event log viewer (Event log explorer, etc..) or the native Windows event viewer (eventvwr.exe) to read all the records that were found in unallocated.

Each event log entry maintains a event record number. When searching in unallocated, it is possible that you could find two records with the same record number, therefore this EnScript renumbers all the records found in unallocated, but leaves the remaining data intact and as exactly as found in unallocated. Each record is assigned a new record number and then exported into the new .Evt file. A new header and footer is built based on the exported data so it can then be read with all the common event log viewing tools.

The exported records viewed in the EVENTVWR app in Windows 7:


The exported records viewed in the Event Log Explorer app in Windows 7:


Prerequisites:
None - This EnScript performs a search automatically. There is no need to search, select (blue check) or preprocess anything. The EnScript will search every unallocated object found, so if you have multiple drives loaded into the case, each one will be searched automatically. The EnScript automatically bookmarks all the "LfLe" search hits (valid and invalid). Some basic error checking is done to validate the record to attempt to ensure it is a complete and valid record before it is exported into the new .EVT file. The new "eventlog.evt" file is created in the default export folder for the active case.

Limitations:
This *only* searches and rebuilds classic Windows NT/2000/XP event (.evt) records. It does not yet support the newer .EVTX (xml) records that are used in Vista, 2008 & 7.

Download here


轉自 forensickb

SSD資料無法100%銷毀

美國加州大學聖地牙哥分校一份研究,揭露出SSD固態硬碟廠商沒有告訴你的真相,儲存在SSD中的資料其實難以完全刪除,存在著資料外洩的風險,而且,不只SSD,大家常用的USB隨身碟、手機、相機等有使用快閃記憶體儲存的裝置,其實都潛藏同樣的風險
撰文⊙王宏仁、陳思翰


SSD廠商沒有告訴你的真相:SSD資料難以完全刪除(1)
SSD廠商沒有告訴你的真相:SSD資料難以完全刪除(2)


加州大學聖地牙哥分校一份研究揭露了SSD資料刪除不完全的安全問題,連美國國防部刪除資料的演算法,也不一定能有效刪除SSD硬碟中的特定文件

SSD廠商沒有告訴你的真相:SSD資料難以完全刪除

今年2月,聖地牙哥加州大學有位博士生Michael Wei,在儲存技術國際研討會(Fast 11)上發表了一份震驚全場的研究報告,他揭露了一個長期存在卻很少有人注意的SSD資料遺漏的安全問題,他說:「想要徹底銷毀SSD固態硬碟上的資料,其實不容易。沒有一種硬碟軟體刪除技術,可以有效刪除SSD硬碟中的特定文件。」


Michael Wei是加州大學聖地牙哥分校專門研究SSD硬碟的非揮發系統實驗室(Non-Volatile Systems Laboratory,NVSL)的成員,NVSL研究團隊發現,使用美國空軍刪除資料的方法,來清除SSD上的一個1GB檔案,仍舊有5.8~7.3% 的資料可以回復,若是USB隨身碟,甚至最高可以回復63.5%的資料。


NVSL研究團隊測試了13種各國官方採用的資料銷燬方法,包括刪除軟體常見的Gutmann模式、英國的British HMG IS5模式、德國的German VSITR模式、俄羅斯的German VSITR模式等,甚是美國國防部US DoD 5220.22-M。他們在SSD硬碟和USB隨身碟上寫入一個1GB大小的檔案,利用這13種方法刪除後,仍然可以回復數十MB甚至上百MB的資料,沒有一種方法能有效地徹底抹除這個檔案。

 
臺灣科技大學電子系助理教授吳晉賢表示,資料難以刪除的關鍵是,「SSD儲存資料的方式和傳統硬碟截然不同。」


SSD快閃記憶體儲存方式有三項限制
吳晉賢解釋,因為SSD使用快閃記憶體來儲存資料,電路特性會產生三個傳統硬碟所沒有的限制,這也導致SSD和硬碟儲存方式的差異


首先,資料不能重複寫入。在快閃記憶體上最小的儲存空間稱為一個Cell,一個Cell可以儲存一個位元的資訊,可以是1或0,這就是所謂的SLC儲存方式(Single Bit per Cell)。若要寫入新資料,必須充電來清除這個Cell的電位資訊以後,才可以重新寫入。不像硬碟磁盤上記錄資料的磁性可以反覆改變,也就說可反覆將資料寫入磁盤上同一個位置,達到重複寫入。另一種快閃記憶體技術MLC(Multi-level Cell),也是一樣在一個Cell上用不同電位來儲存2個位元的資訊,同樣也有不能重複寫入的特性。這是硬碟和SSD儲存方式第一個不同點。


第二,快閃記憶體刪除資料的方法也和硬碟磁盤不同,必須採取「逐一寫入整批抹除」的作法。
SSD寫入資料時最小的單位是Page,一個Page依SSD採用的快閃記憶體而有不同,可以是2,048、4,096或8,192Bit等,每次可以寫入1個Page的資料。但是,抹除資料時無法一次抹除1個Page的資料,而必須一整批Page同時抹除,這個整批抹除的單位就是Block,1個 Block通常是64或128個Page,也可以更多如128或256。


基本原則是,寫入時每次1個Page,抹除時則要每次1個Block。因為每次最少要抹除1個Block,即使這個Block只有寫入了幾個Page的資料,SSD還是會一次抹除這個Block中所有Page的資料。因為必須採取整批寫入的方式,所以SSD的抹除速度會比讀取速度慢很多。

 
若是要更新某一個Page資料的作法也相當繁複,必須先將整個Block中記錄的資訊取出,存放到快取記憶體中,再更新這段快取記憶體中的資料,最後再逐一將Page資料寫回這個Block中。


最後一個特性是快閃記憶體寫入資料有次數限制,例如有的快閃記憶體的電路特性可以寫入10萬次。當一個區域寫入次數達到這個限制以後,就無法再寫入,成為壞死區域(Bad Sector)。為了延長SSD的使用壽命,就必須避免寫入集中在少數區域,讓寫入資料平均分配到每一個Cell上。


用FTL中間層解決快閃記憶體的儲存限制
因為快閃記憶體這三個特性,所以,SSD採取了一種和傳統硬碟截然不同的存取架構,在檔案系統和實體資料儲存層之間,增加一個FTL層(Flash Translation Layer),FTL層會負責提供檔案系統和實體資料層之間的對應,讓作業系統仍舊看到和硬碟一樣的檔案系統。但是在實際儲存資料時,FTL層會將資料分散到不同的位置儲存,避免寫入動作集中在少數區域。


雖然SSD底層的實際寫入機制和硬碟不同,但FTL會模擬出像硬碟一樣的檔案系統,讓作業系統用同樣控制硬碟的指令,來控制SSD的寫入。


因為FTL層會移動資料實際存放的位置,這會造成資料覆寫的效果和傳統硬碟不同。
在傳統硬碟上,作業系統可以知道資料實際寫入的位置,若要覆蓋原來的資料,就在相同位置寫入資料。但是在SSD中,作業系統以為自己寫入相同位置的資料,但FTL層可能將第二次覆寫的資料,儲存到SSD中其他位置,而沒有蓋掉原來的資料,導致在SSD中無法透過資料覆寫來刪除原有資料。


SSD與傳統硬碟大不
SSD存取資料的架構和傳統硬碟截然不同。SSD在檔案系統和實體資料儲存層之間,增加一個FTL層(Flash Translation Layer),FTL層會負責提供檔案系統和實體資料層之間的對應,讓作業系統仍舊看到和硬碟一樣的檔案系統,但是在實際儲存資料時,FTL層會將資料分散到不同的位置儲存,避免寫入動作集中在少數區域。


因為FTL層會移動資料實際存放的位置,這會造成資料覆寫的效果和傳統硬碟不同。作業系統以為自己寫入相同位置的資料,但FTL層可能將第二次覆寫的資料,儲存到SSD中其他位置,原來資料仍舊存在,難以透過資料覆寫來摧毀SSD中的舊資料。


寫入方法大不同
SSD寫入資料時,FTL層為了平均使用每一個內部位置,會移動實際儲存資料的位置,作業系統角度看到的位置,不一定是實際存放資料的位置和順序。但是,傳統硬碟沒有FTL,作業系統和硬碟實際位置相符。

覆寫方法大不同
傳統硬碟覆寫資料時會直接蓋掉舊有資料,但是在SSD中,FTL層會標記舊有位置的資料無效,再將要覆寫的資料儲存到另一個位置,無法透過覆寫來刪除資料。


還有另一個造成資料不易刪除的原因,是廠商特別為SSD設計的資料抹寫方式TRIM機制。因為SSD必須整批寫入的特性,導致抹寫速度遠比讀取速度慢。減少實際寫入的次數,除了能延長使用壽命也可以提高SSD的存取效能,所以,廠商讓SSD的TFL層先對需要刪除的資料加註記號,而不實際進行刪除,等到這個Block中多數Page的資料都需要刪除時,才真正實際抹除這個Block。


例如SSD要刪除大量小檔案時,若每刪除一個檔案就要抹除一次,一個Block可能需要抹寫數十次。改用TRIM的作法以後,可以逐次將需要刪除的檔案標記下來,等到系統有閒暇時再一次抹除。這樣的作法,更讓資料在SSD中實際存活的時間更久,甚至是,作業系統以為資料已經刪除,但實情剛好相反。


SSD為效能和使用壽命而降低抹除可靠性
因為SSD有寫入次數的壽命限制,寫入速度也遠遠慢於讀取速度,廠商特別為SSD設計了一種不同於傳統硬碟的資料抹寫方式,稱為TRIM機制。當作業系統要刪除一筆資料時,SSD的TFL層先對需要刪除的資料加註記號,但沒有實際進行刪除,等到儲存資料所處的Block區域有多數資料需要刪除時,才會真正實際抹除這個Block,利用TRIM減少耗時的實際抹除動作,也因此,在實際抹除之前,舊資料一直存在,遺漏風險就會比傳統硬碟更高。

傳統硬碟
傳統硬碟沒有TRIM機制,作業系統刪除資料時,就會同時刪除在硬碟實際位置上的資料,資料遺漏的風險比SSD的風險低。


SSD硬碟
SSD的TRIM機制會先透過標記方式註明待刪除的資料無效,讓作業系統誤以為刪除完成,其實資料還在,就算多次寫入,也不一定能覆蓋。


FTL是黑盒子,隱藏資料遺漏的隱憂
吳晉賢表示,FTL層就像是一個黑盒子,將作業系統的檔案系統和實際寫入動作隔離,作業系統不知道盒子裡會發生了什麼事情。


加州大學聖地牙哥分校NVSL研究團隊正是打開這個黑盒子以後,發現了SSD會有資料無法刪除的隱憂。


NVSL研究團隊購買了12款常見的SSD,容量從32GB到120GB不等,包括使用MLC和SLC快閃記憶體的產品。他們自製了一個快閃記憶體讀取裝置,來避開FTL層的控制,直接取得實際儲存在快閃記憶體中的資訊,再測試各種不同的資料刪除情境和作法,來比較FTL層的影響,找出SSD資料刪除的問題。

 
低階指令全面抹除有效,但SSD不一定支援
NVSL的研究發現,如果使用低階磁碟控制指令ATA Command中的刪除指令,針對整顆SSD資料進行全面抹除,通常可以有效抹除資料,但是,不是每一款SSD都能正確支援這種指令,在NVSL的測試中也有一款SSD執行ATA刪除指令後,SSD只是註記刪除位置,而沒有實際抹除。


部分檔案刪除難度高,國防等級刪除法也沒輒
有時不一定能採取全面抹除的作法,NVSL也考慮了另一種情況,在經常使用的SSD中,只刪除特定敏感性的文件。NVSL發現,若將上千個檔案寫入SSD 後,有些檔案可能被複製了16份,散布在SSD中不同位置,想要單獨刪除其中特定檔案的難度相當高。NVSL測試了13種各國官方認可的資料刪除方法,都無法徹底刪除測試檔案的資料,在SSD中仍舊有部分測試檔案的資料可以回復。

吳晉賢表示,一般電子科系的大學生,就有能力使用便宜的8051單晶片做出可以直接存取快閃記憶體資料的工具,成本也不高,要取出SSD中尚未抹除的資料並不難。

不過,他認為,就算取出資料也不一定能夠完全重建出原始的檔案內容,只有像圖檔這種會連續儲存,即使部分損毀也能呈現的資料格式,比較有機會復原,或者是能取得文件標頭資訊才有可能重建出可用的內容。簡而言之,資料就算取回,能有效回復的機會也不大,但並不是完全沒有可能。


軟體抹除與實體摧毀孰勝?專家看法分歧
若SSD不需要繼續使用,SSD廠商OCZ(飢餓鯊)亞太營運中心產品經理程威笛建議,實體摧毀也是一個可行的作法。他表示,快閃記憶體晶片其實非常脆弱,只要有些許破損就無法使用。不過,同樣也是生產SSD的廠商宜鼎國際研發處協理吳錫熙則有不同的看法,他認為硬體破壞仍有資料遺漏風險,透過軟體徹底抹除SSD內容的安全性更佳。


但是,全面抹除的作法非常耗時,程威笛表示,他曾利用HD Tune軟體中的Gutmann演算法來抹除一顆120GB的SSD,花了8小時才處理完畢。有些SSD廠商的抹除工具也只能支援自家產品,而不能抹除所有的SSD產品。


吳晉賢倒是提出了另一個可以徹底保護SSD資料的作法,他建議,最保險又方便的作法是加密,將資料加密後再放入SSD,未來只要摧毀解密金鑰,資料就算被回復也無法解讀。不過,資料加密會影響存取效能,或是耗用處理器運算能力。


不只是SSD有風險,NVSL團隊提醒,凡是採用快閃記憶體的產品,包括了SSD,USB隨身碟、相機的SD記憶卡、手機、iPad、iPhone等產品,都有同樣的資料遺漏風險。


這些生活中常見的3C產品,保存了各種個人資料、私密照片、簡訊、電話等,倘若儲存的資料會有刪除不完全的問題,有心人士就有可能利用檔案回復技術來偷取資料,甚至是借用朋友的USB隨身碟暫存資料,也有可能會導致外洩問題。越來越多商用刀鋒伺服器和筆記型電腦開始採用SSD,這也意味著,企業重要的內部資料可能會因這些SSD遺失而外洩。


雖然,SSD資料刪除的威脅和解決方法的成效,各方意見仍有分歧,這也反映出SSD使用的複雜性,原本企業採用SSD的目的是為了提高讀取效率,但也不能忽略可能伴隨的資料遺漏風險。企業採購和運用SSD時,必須先了解SSD潛藏的問題,才能掌握可能風險,更縝密地評估需求,找出適合企業的運用之道。


加密才能徹底避免外洩風險

臺灣科技大學電子系助理教授 吳晉賢
臺灣科技大學電子系助理教授吳晉賢認為,廠商為了提高SSD硬碟效率和壽命,會透過FTL層來分散和延後實際資料寫入的動作,這會讓SSD中的舊資料不容易徹底抹除。


雖然不同廠牌SSD在FTL層的運作方式略有差異,廠商也會各自發展出不同的分散或抹除演算法。導致FTL就像是一個黑盒子,作業系統無法真正曉得盒子裡發生的事情,也無法運用現有硬碟軟體技術徹底有效抹除SSD的資料。


一般電子科系的大學生,很容易就能取得快閃記憶體存取資料的方法,也有能力利用便宜的8051單晶片做出直接存取快閃記憶體資料的工具,成本也不高,要取出SSD中尚未抹除的資料並不難。

不過,他認為,就算能夠取得快閃記憶體中資料,也不一定能夠完全重建出原始的檔案內容。除非像是圖檔格式的資料,儲存到SSD時會連續寫入,圖檔資料容易集中,就有機會回復,有些圖片壓縮格式即使部分損毀也能呈現畫面內容,就容易發生資料外洩的情況。或者是取得文件標頭資訊才有可能重建出可用的內容。簡而言之,就算有心人士取得SSD中的舊資料,能有效回復的機會也不大,但並非完全不可能。

吳晉賢認為,硬體破壞是一個可以採行的方法,不過傳統硬碟可用的消磁方式對SSD無效。因為快閃記憶體的運作方式不是磁性作用,所以,無法透過消磁來破壞資料。


吳晉賢倒是提出了一個可以徹底保護SSD資料的作法,他建議,最保險又方便的作法是加密,將資料加密後再放入SSD,未來只要摧毀解密金鑰,資料就算被回復也無法解讀,未來,廠商也可能直接將加密技術放入FTL層,來避免SSD資料外洩的風險。不過,資料加密會影響存取效能,或是耗用處理器運算能力。


僅部分產品能靠指令抹除
通常SSD的使用者在刪除資料時,資料並不會真的從快閃記憶體內抹除掉,而是被標記成已抹除的資料,在SSD需要釋放空間時,才會真正將資料給抹去。像支援TRIM功能的SSD,會在閒置時自動抹除資料;而不支援該功能的,則要視該SSD上的演算法而定,它會計算出何時該進行資料抹除。
 
如果使用者要自己進行資料抹除,則可以使用ANSI標準的ATA Secure Erase指令。而一位不願具名的金士頓(Kingston)技術支援部工程師表示,雖然SSD都擁有原生的內部指令,但是也要看各家的快閃記憶體控制器是否提供該功能,無則不能使用。


針對ATA Secure Erase指令支援度,目前市面上的SSD粗分成三種。第一種是支援該指令,當SSD接收到指令時,會將快閃記憶體上的邏輯區塊位址抹除,而這會讓區塊位置標示成已抹除的狀態,等同於回復到剛出廠的狀態。第二種則不支援指令,這是因為有些快閃記憶體控制器,並沒有支援ATA的ANSI標準指令,這類情形較會出現在早期的SSD上。而第三種則是表面支援指令,也可以執行該指令,但實際上卻無法抹除。


金士頓表示,他們自家的產品支援ANSI標準的ATA Normal Secure Erase及ATA Enhanced Secure Erase指令。使用者可透過HDDerase這套軟體,在DOS模式下抹除SSD。而這兩個指令的作用上,前者是將邏輯區塊位址抹除,來達到銷毀資料的目的;而後者的功能較為進階,它是將SSD上加密的金鑰摧毀,這會讓加密的資料幾乎無法進行解碼。


不過需注意的是,SSD上的超額配置(over-provisioning)空間,是用來暫存及加速存取資料用。而這部份的快閃記憶體,並不受Secure Erase指令影響。所以在抹除時,該區塊有可能會殘存部分資料。


可抹除SSD的小程式
HDDerase僅能在DOS模式下運行,使用者能透過它執行Secure Erase指令。這套軟體能依照安全等級,執行共4種層級的抹除指令,依照等級排列為Normal File Deletion、DoD 5220 Block Erase、Secure Erase及NIST 800-88 Enhanced Secure Erase。


軟體抹除較硬體破壞徹底

對於資料抹除,並非各家都使用硬體方式破壞。像同樣生產SSD的廠商宜鼎國際(InnoDisk),該公司的研發處協理吳錫熙表示,因為他們的客戶有更高的機密考量需求,所以要求資料絕對不能有任何一絲外流的可能性。而在資料抹除上,他認為使用硬體方式破壞時,假設快閃記憶體沒有完全故障,還是有極低的可能性,能將資料從快閃記憶體內給取出。


也因為這樣,有客戶曾要求他們以軟體的方式,將SSD徹底抹寫或破壞掉。如此一來,就算這些處理後的硬體被有心人士取走時,也會發現快閃記憶體內毫無資料。雖然用軟體抹除已經能確保資料抹除,但他們發現依舊有少部分客戶,會在軟體抹除完後,再透過硬體層面破壞SSD。


吳錫熙表示,它們軟體破壞的方法,並非透過作業系統去下達指令,因為這太耗費時間。而且有些資料抹除方式,只是將作業系統內的檔案配置表(FAT,File Allocation Table)刪除,但資料依舊保存在快閃記憶體內。但只要透過Final Data這類檔案救援軟體,就能重建檔案配置表,進而將資料從快閃記憶體中取出。


所以他們抹除資料的方式,是直接針對SSD下達抹除指令。不但能真正將資料抹除外,而省去作業系統這層傳遞指令,抹除速度也快上許多。吳錫熙說,宜鼎自家的儲存產品擁有兩種抹除指令。


一種是Destroy指令,該指令能夠將SSD資料完全抹除,並且會將快閃記憶體內原有的壞塊資訊也抹寫掉。而執行Destroy後,整顆SSD將會回到尚未開卡前的狀態,不能使用之外,也無法進行讀取;而且,Destroy一顆128GB的SSD,大約只要6秒。而另一種Quick Erase指令,一樣是將SSD資料抹寫,但只是將區塊中的資料給清除。執行完後,使SSD能夠重複使用。而Quick Erase一顆128GB的SSD,大約需55秒。


靠軟體並不能徹底抹除資料

事實上,去掉外殼的SSD是非常脆弱的。SSD廠商OCZ(飢餓鯊)亞太營運中心產品經理程威迪表示,他們比較常遇到的問題,是如何保存和讀取資料,較少在破壞這一塊。而提出銷毀需求的客戶,多半是企業而非個人,他們幾乎都是用硬體方式直接破壞SSD實體裝置,來達到資料銷毀的目的。
而這些廠商為何不認同軟體抹除的效果?程威迪說,這是因為,透過軟體抹除雖然能有效地將資料破壞到不可辨識,但還是有很低的機率,能將些許資料復原。


再加上,目前市面上資料抹除軟體,很少是針對SSD的特性去設計,所以都是使用針對一般硬碟的抹除軟體。而因為兩者架構上的差異,在抹除時通常會遺漏掉SSD的部分儲存區。程威迪表示,雖然架構不同,但還是能有效地抹除近70%的資料。


除了資料抹除不完全外,再加上抹除所需時間久,所以廠商大多選擇硬體方式破壞。程威迪說,他自己實驗過,使用HD Tune軟體Pro版的Gutmann演算法,將一顆120GB的SSD進行抹除,約要花上8個小時才能處理完畢。而且這還只有抹除掉約70%的資料,如果要做到徹底抹除,所花的時間可能需更久。


程威迪說,在硬體破壞方面,只要將SSD外殼拆掉,外力敲擊就能造成致命性的傷害。這是因為快閃記憶體非常脆弱,像針腳只要折斷一部分,就會造成傳輸訊號不穩。而且快閃記憶體是將晶圓封裝起來的產品,只要晶圓有一點損傷就等同全毀。


利用敲擊這方式去破壞並沒有特別的訣竅,因為目前大多SSD都採用平均抹寫技術(Wear-Leveling),資料會分別存放在各快閃記憶體上。所以只要破壞SSD中的一片快閃記憶體,其餘記憶體的資料則等同失效。


4種銷毀SSD資料的方法

由於SSD的硬體架構和儲存方式都與一般硬碟不同,所以不管透過軟、硬體方式抹除資料時,都會有些許差異。像SSD的硬體架構,是由多片快閃記憶體及一組控制晶片所組成;這與由碟片、磁頭組成的一般硬碟完全不同。


也因為儲存介質不同,所以在物理的儲存方式上也有所差異。像SSD是透過電流,在快閃記憶體的閘極中留下電子,來儲存資料;而一般硬碟雖然也是使用電流,目的是改變碟片上的磁性,以便將資料存放在碟片上。而這些差異,會影響破壞方式的程度,像一般硬碟運作遭到衝擊時,極有可能因為磁頭位置偏差刮傷碟片,而造成永久性破壞;而SSD則無物理性的磁頭讀寫步驟,都是以電子訊號傳輸,故撞擊對於SSD的影響較不顯著。


將SSD拆開後,可以看到其內部是由一張電路板,上面組合多片快閃記憶體和控制晶片而成。而去除掉外殼的SSD很容易受到破壞,不論在撞擊、耐溫等層面,等同毫無保護。
但SSD也並非我們想像中堅固,如果將其外殼拆開,讓內部晶片、記憶體裸露。光是這樣,就很有可能造成SSD的損壞。這是因為SSD的主要儲存元件為快閃記憶體,而快閃記憶體則是封裝過後的晶圓。它非常脆弱,光是人體靜電就有可能造成損傷。更甭提以物理方式敲擊、折斷,而以這類方式破壞快閃記憶體,幾乎不可能救回資料。
而接下來,我們將介紹軟體抹除、鐵鎚敲擊、火燒、泡水及消磁,這些對於一般硬碟有具體傷害的破壞方法。而這些方式,它對於SSD的破壞程度會有多大。


方法 1 軟體抹除法
不論一般硬碟與SSD,都能透過軟體將硬碟上的資料給抹除。而軟體抹除方式有很多種,有的是將資料徹底抹去,清空磁碟空間;而有的則是將隨機產生的亂數資料,重複且多次地寫入磁區,來將資料損毀。而這兩種方式對於銷毀資料都有一定的效果,目的都是要讓資料不可使用。


而目前要使用軟體抹除,可以使用HD Tune及HDDerase這兩套軟體實做。像HD Tune上有四種抹除方式,如零填充、隨機填充、美國國防部DOD 5220.22-M標準及德國Gutmann演算法。


像零填充能夠將快閃記憶體內的資料,全部抹寫成0。但因為硬體設計關係,有時電壓並不能夠完整將電子移除,所以並不能保證資料被抹除。不過因為邏輯區塊位址也被抹寫,所以就算實體層找到區塊內有資料,也不能將資料取出。


而HDDerase這套軟體,則可以執行ANSI標準的ATA Secure Erase指令。而大多支援抹除指令的SSD,都能夠用它進行標準及進階的資料抹除。標準的抹除指令功能有點類似零填充,它是將邏輯區塊位址抹除,而進階的抹除指令則是摧毀SSD上的加密金鑰。

一般企業使用這兩套軟體抹除,已足夠銷毀大多數資料。但這方法的缺點是,透過軟體抹除需耗去大量時間,而且在安全性上依舊有餘慮。


SDD資料經過重複抹寫後,大多幾乎不可辨識。


方法 2 鐵槌敲擊法
鐵槌敲擊法對於SSD與一般硬碟皆有極高的破壞性,而且也是IT人員損毀門檻最低的一種方式。
使用鐵鎚敲擊一般硬碟時,只要將碟片敲打至變形,幾乎就無法取得碟片上的資料。這是因為磁頭與碟片的定位點已經歪掉,要重新找回定位點並讀取資料,幾乎不可能。


而用鐵鎚敲擊SSD更簡單,由於SSD硬碟非常脆弱,只要將其外殼拆下後,就形同毫無保護。拆開外殼後的SSD硬碟,會看到只有一片IC電路板,上面有著多片快閃記憶體。只要拿鐵鎚擊碎其中一片快閃記憶體,整顆SSD就等同報廢。這是因為SSD大多有平均抹寫技術,導致資料不像一般硬碟,會將資料連續寫入在相同的區塊。所以即使損毀其中一片,剩餘的資料亦不能組合成完整檔案。


在破壞難度上,SSD較一般硬碟輕鬆。這是因為SSD範圍較小,且快閃記憶體硬度也較低,能輕鬆擊破;不像一般硬碟需要將各個碟片分別取下,並將它敲至變形才可。


而破壞SSD不一定要拿鐵鎚敲擊,只要是重物或是尖銳物體,就足夠破壞快閃記憶體,其破壞門檻不但低,且為多個銷毀方式中最有效果的一種。


SSD內的快閃記憶體遭擊碎後,資料幾乎確定無法復原。


方法 3 焚毀法
通常焚毀法分為兩種,一種是送進焚化爐,將硬碟給徹底燒毀。但一般企業並不會有這種設備,所以通常會選擇第二種,自行使用噴槍焚燒硬碟。


而一般硬碟使用焚毀法時,只要破壞表面磁粉,就能將當中的資料損毀。但麻煩的地方在於,一般硬碟有多個碟片,要確保完全毀損就需將每張碟片的表面都均勻焚毀,否則還是有機會能將資料取出。


但SSD的焚燒難度較低,因為硬體不同於一般硬碟。SSD因為面積小,且快閃記憶體的耐熱溫度為攝氏70至85度。再加上SSD是由電路板和快閃記憶體組合而成,不像一般硬碟整體金屬含量高,較難焚毀。


所以在焚燒SSD時,可能不需要用到噴槍,只要使用打火機持續燃燒一段時間,就能夠成功焚毀SSD。而快閃記憶體經過焚毀後,效果等同於敲擊法,幾乎成為不可復原的狀態,理當資料不能取出。
雖然焚毀法對於SSD的難度較一般硬碟低,也較容易銷毀。但企業在使用該方法破壞時,仍有其危險度,請慎選銷毀的場地。


SSD因為耐熱溫度低且面積小,透過打火機持續加熱快閃記憶體,即可破壞。


方法 4 消磁及泡水
以一般硬碟而言,使用消磁及泡水這兩種方式,大多都能有效地造成大範圍傷害,並損傷部份資料。不過,這兩者對於SSD,雖然不敢保證毫無傷害,但能造成資料損傷的機會極低。
磁力須達到一定強度等級,才有可能讓快閃記憶體產生電流,進而達到損毀的目的。


以消磁而言,因為快閃記憶體是靠電壓來抹除和寫入。因為快閃記憶體內的資料是電子,理論上來說,如果磁場強度夠,是可以讓快閃記憶體的金屬層產生電流進而摧毀,並導致無法讀取。不過在使用消磁機時,並無法只針對快閃記憶體抹除資料,所以對SSD進行消磁可能無效。


由於泡水並不會破壞線路,所以資料毀損率不高。

而泡水對於一般硬碟傷害非常嚴重,因為水會破壞碟片上的磁粉。但是對於SSD,泡水的方式則不太行。這是因為水並沒有破壞到線路,只要印刷電路板是好的,基本上吹乾後導電就可以使用。但如果水分沒有清除完畢就通電,還是有可能會造成短路而故障。

簡單來說,SSD就像我們日常使用的隨身碟,有時不小心送進洗衣機,拿出來吹乾後還是能使用。但它也跟大多數使用電路板的設備一樣,如果泡到海水或是具腐蝕性的液體,幾乎等同報廢。